
Table of Contents
Droppable Characters:

Zephyr
|
HP |
3,702 |
|
Attack |
1,252 |
|
RCV |
88 |
|
Type |
INT Shooter |
|
Special |
For 2 turns, Shooter types receive a 1.75x ATK boost |
|
Special Cooldown |
30 Turns -> 16 Turns |
|
Captain Ability |
Boost ATK of Shooter types by 2.5x |
|
Our Rating |
9/10 |
This is the character that Shooter units have been waiting for. His 2.5x boost for Shooters will definitely up their usability, even before considering his amazing Special. While there aren’t a lot of great Shooter units available right now, better units will be released in the future, so Zephyr is definitely a must capture. Plus, his evolved form’s attack looks pretty rad.
Let’s talk about that special for a bit. It’s basically a slightly weaker Nico Robin special, except spread over two turns. In other words, it’s pretty awesome. The real question though is: Should you try to max out his special? The answer to that is obviously yes, but that doesn’t mean you have to do it right now. Our suggestion, especially if you’re a F2P player, would be to get in as many runs as you can, but to not worry if you don’t get him maxed during this event. He will be back in a few months and, by that point, you’ll have a stronger team to make the run with and we will have a much larger selection of Shooter types to choose from. Of course, definitely max him if you have the resources, but that choice is up to you.

Ain
|
HP |
908 |
|
Attack |
679 |
|
RCV |
285 |
|
Type |
QCK Shooter |
|
Special |
Reduce the sealed state of both Captains by three |
|
Special Cooldown |
22 Turns -> 15 Turns |
|
Captain Ability |
None |
|
Our Rating |
5/10 |
While certainly not anywhere near as useful as Zephyr, you shouldn’t be too hasty to toss Ain out. While she doesn’t have the greatest stats, she is currently the only available Sealed State reducer for Shooter teams. If you’re planning to run a Shooter team later on (they get really good), then you may want to hold onto her. Work on getting her cooldown down as well.
Total Stages: 5
Special Conditions: N/A
Due to the low stage count for raid bosses and the need to charge up Character specials, we will be taking a little more in-depth walk through each of these stages.
Stage 1/5:

|
|
HP |
ATK |
Special |
|
INT Minion |
~7,200 |
5,500 |
N/A |
|
DEX Minion |
~7,200 |
??? |
N/A |
|
QCK Minion |
~7,200 |
??? |
N/A |
|
STR Minion |
~7,200 |
??? |
N/A |
We don’t really recommend taking damage to stall here, but the option is there if you need it.
Stage 2/5:

|
3 |
|
|
HP (each) |
9 |
|
Attack |
1,180 |
|
Max. Turns w/o Taking Damage |
3 Min. – 5 Max |
|
Max. Turns with Taking Damage |
9 |
This will be the first good stage to actually take hits if you need to. The biggest thing to keep in mind is that each turtle only has 9 HP, so make sure you attack with a character that only hits 4 times (Garp works).
Stage 3/5:
|
|
HP |
ATK |
Special |
|
Ain |
80,000 |
3,500 |
See below |
|
Random Minions |
??? |
??? |
N/A |
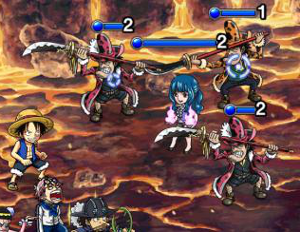
Ain’s encounter isn’t all that hard, but some teams can get in trouble here if they aren’t paying attention. You should always take out the minions first, unless you want to take extra damage for some reason (Whitebeard). The following is Ain’s attack pattern:
|
Preemptive |
Lock middle two units for 3 turns |
|
Turn 1 |
Nothing |
|
Turn 2 |
3,500 Damage |
|
Turn 3 |
Lock left three units for 3 turns |
|
Turn 4 |
3,500 Damage |
|
Turn 5 |
Nothing |
|
Turn 6 |
3,500 Damage |
|
Continues Repeating Turns 5 and 6 |
|
Teams with high HP (Garp teams), may very well want to stall for 5+ turns on this stage. Teams with lower HP may want to just take her out in 2-3 turns. Your strategy here, just as with the other stages, will completely depend on what team you are using.
Note: Keep in mind, when calculating how many turns you need to stall for your Specials, Ain’s preemptive special counts as a turn. However, none of her other specials will give extra turns.
Stage 4/5:

The Elder Seahorse will start this stage by changing all of your orbs to Meat. This isn’t really a bad thing, since you’ll be able to heal up any damage you took on previous stages.
Note: As with Ain, the Elder Seahorse’s preemptive special counts as a turn for special counters.
|
|
HP |
ATK |
Special |
|
Elder Seahorses |
6 |
??? |
Lock random unit 12 turns |
|
Teen Seahorse |
1 |
1,112 |
N/A |
|
Pirate Penguin |
1 |
1,002 |
N/A |
|
Random Minions |
??? |
??3,200?? |
N/A |
The biggest priority here is taking out the two Elder Seahorses. Allowing them to lock a unit for 12 turns, especially if it’s a Captain, could be devastating. You may have to manually target them, so be careful.
Once the Elders are taken care of, you can focus on stalling for however long your team needs. The Teen Seahorse and Pirate Penguin are nice to take hits from, but they can only take one hit each.
Stage 5/10:

Time for the big man himself to make an appearance.
|
HP |
3,500,000 |
|
Initial Defense |
700 |
|
Preemptive Special |
Can’t be debuffed for 1 turn |
|
Normal Attack |
16,000 |
|
Attack < 20% HP |
36,000 |
|
Turn 0 |
Can’t be debuffed for 1 turn |
|
Turn 1 |
Locks
bottom row units for 2 turns |
|
Turn 2 |
Nothing |
|
Turn 3 |
16,000
Damage (if above 20%) |
|
Turn 4 |
Nothing |
|
Turn 5 |
Nothing |
|
Turn 6 |
16,000 Damage |
|
Turn 7 |
Nothing |
|
Turn 8 |
Nothing * Debuffs may now be used |
|
Turn 9 |
16,000 damage |
|
Continues 3 Turn Attack Pattern |
|
Note: His debuff protection special protects him from all forms of debuff, including turn delay (ie: GP Usopp). You will not be able to use debuffs against him until Turn 8.
You should already be able to see that Zephyr is no pushover. Let’s just skip straight on to team discussion, so we can figure out how to take this guy out.
The following is a list of teams that have proven effective for this event. While we try to give minimum level requirements where possible, you should most likely shoot for a minimum level of 50 for most of the characters in your team. It’s definitely possible that some teams can complete the event with lower levels, but that will be subjective. As always, before trying out any team and wasting your stamina, we recommend that you test out your team’s damage output using the following damage calculator: http://optc.github.io/damage/#/
Don’t forget to adjust the calculator for Zephyr’s defense!
Note: We try to be as conservative as possible when running our damage calculations. As such, we assume that you will never receive matching orbs (unless through specials) and that, if a special gives random orbs, it will give them to your weakest characters. It would be almost impossible to control for every single variable, especially in the longer fights, but we try to do our best. The last thing we want is for you to waste your hard earned Stamina/Gems because we were overly optimistic.
Note: Perona was released after this guide was written but before the release of Zephyr, which we did not expect. Perona can be substituted for Alvida/Mirage Nami in any of the teams below, assuming her cooldown is sufficient (ie: matches the cooldown we require for Alvida/Mirage Nami).
|
|
|
|
|
|
|
|
|
|
|
|


This is nice guide.
ReplyDelete